I have to admit that I’ve been quite resistant to Docker because of the obscurity that it creates, and I haven’t had time to sit down and get comfortable with the platform. Welp, I took some much need PTO from work and spend some of that time rebuilding my homelab. As part of that process, I experimented with TrueNAS Scale, which has a really nice UI for deploying containerized applications via Docker Compose. However, it doesn’t work perfectly for every containerized app. I needed to play with some things that weren’t working in it, so I decided to give straight docker on Ubuntu a try. It works pretty great so far, so I wanted to share my setup process and some quick tools I’ve found to help manage things.
For the purposes of this build, I’ll be using an Ubuntu 22.04 VM.
Installing Docker and Docker Compose on Ubuntu 22.04
First, we need to add the apt repository to Ubuntu
# Add Docker's official GPG key:
sudo apt-get update
sudo apt-get install ca-certificates curl
sudo install -m 0755 -d /etc/apt/keyrings
sudo curl -fsSL https://download.docker.com/linux/ubuntu/gpg -o /etc/apt/keyrings/docker.asc
sudo chmod a+r /etc/apt/keyrings/docker.asc

# Add the repository to Apt sources:
echo \
  "deb [arch=$(dpkg --print-architecture) signed-by=/etc/apt/keyrings/docker.asc] https://download.docker.com/linux/ubuntu \
  $(. /etc/os-release && echo "${UBUNTU_CODENAME:-$VERSION_CODENAME}") stable" | \
  sudo tee /etc/apt/sources.list.d/docker.list > /dev/null
sudo apt-get update
Now, we can install Docker and it’s various packages
sudo apt-get install docker-ce docker-ce-cli containerd.io docker-buildx-plugin docker-compose-pluginFinally, let’s test that it works.
sudo docker run hello-worldI’ve had issues where the docker compose command doesn’t work until you reboot, so at this point, I just add a reboot to be sure we’re good.
Docker Compose
My personal preferred way to run containers is to utilize Docker Compose. It’s convenient and gives you some pretty straightforward ways to manage your images and control environment variables and things in one clean place.
We’re going to play with the basic Nginx image. Let’s make a place to store the compose file:
mkdir /home/nginxNow, let’s create the docker compose file. Use whatever text editor you like. I prefer nano.
cd /home/nginx
nano docker-compose.yml
Add the following content to the file and save it.
services:
  web:
    image: nginx:alpine
    ports:
      - "8080:80"
Finally, let’s start the container in the background
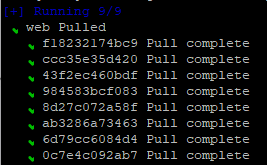
docker compose up -dWhen you run the above command, the nginx container will be spun up. Since we haven’t spun it up before, it starts by downloading the images needed:
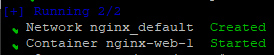
Next, it’ll create the network and launch the pod:
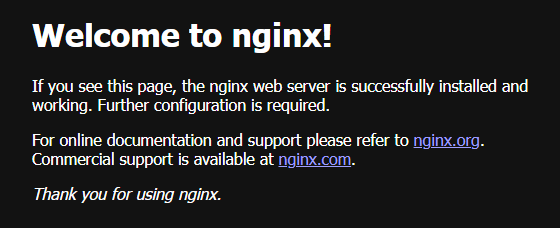
Now go to your IP:PORT in a browser (port 8080 if you didn’t change the docker-compose file) and you will see the NGINX success page.
Finally, let’s shutdown the container.
docker compose downDocker Commands to keep handy
Cool, so now we have the engine installed. But how do we actually manage our containers? First, let’s start with adding
How do I see what containers are running and what their container IDs are?
docker psRunning docker ps, you will get a really nice table view of the running containers, their IDs, and some other information about them.

How do I see the logs for the container?
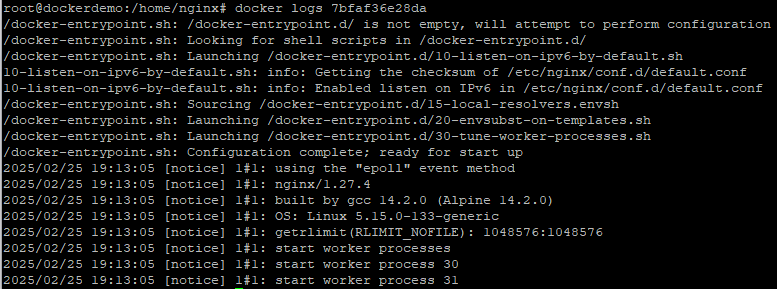
docker logs {id}
docker logs 7bfaf36e28da
You will want to get the container ID of the pod you want logs for from docker ps and then run docker logs {id}. This will give you a view into the logs for the pod. This is particularly useful when the pod is having problems.
I want to SSH into the container itself. How?
# Log in as the default user
docker exec -it {id} /bin/bash #If the image has bash
docker exec -it {id} sh #Backup in case it doesn't have bash

# Log in as root
docker exec -u 0 -it {id} /bin/bash
docker exec -u 0 -it {id} sh
docker exec will allow you to execute commands against the pod. The -it parameter makes the command interactive and allocates a pseudo-TTY. The ID of the pod is what you get from docker ps and finally the command you want to run. For example, /bin/bash or sh
For more information on what you can do with docker exec, see the documentation.